I'm dreaming of a white Christmas. Currently we have just a wee bit of a dusting. It doesn't seem possible to have Christmas in Vermont without our lovely white snow covered trees. So here's to a freak blizzard or at least a couple inches of the fluffy stuff.
Merry Christmas to all 12 of my blog followers! :)
Monday, December 19, 2011
Sunday, November 27, 2011
Leaf Turkey

We filled a large paper grocery bag and filled it with newspaper. Then we used white glue to attach leaves all over the body. To give the leaves a bit of shine and help them adhere a bit better, we added a layer of spray gloss.
For the head we cut out a cardboard box and embellished it.
Voila...our very own leaf Turkey to help us celebrate the harvest season.
Hope you had a wonderful Thanksgiving~ I know we did!

Wednesday, October 12, 2011
Spiders, Spiders, Spiders
Currently I am teaching about spiders in my preschool classroom (ages 3-5). I thought I'd compile my spider ideas into one blog post so I could reference it in the future. Keep in mind, we didn't do all these ideas....if we had we'd be learing about spiders for a full month or more!
Lucky for me I have a great test audience at home - my 6 year old son and 2.5 year old daughter! The photos are my kiddos testing out the projects for preschool!
Weaving Webs:
1. Paper plate with whole punches along the edge. Tie a string onto one hole. At the other end of the string attach a small piece of pipe cleaner, this will be used to weave the web and when finished attach a spider ring to the pipe cleaner. This is great for fine motor skills. For younger children make sure the string isn't too long or it becomes frustrating for them to weave.
My preschoolers had a lot of fun with this project and they were extremely excited to take it home to play with. Next time I'd like to have some flies to attach as well.

2. Foam trays with small notches cut out of can be used for weaving webs as well.
3. Glue three tongue depressors or popsicle sticks together to form a star. Attach a string to one and weave the web by looping around stick, pulling straight to the next, looping, pulling straight, and continue until finished. This could also be done by using small branches or sticks from nature!
4. For older children you could teach them how to make a dream catcher. (This site has a good tutorial - http://www.nativetech.org/dreamcat/dreminst.html ) Comparing a real spider web to your homemade dream catcher would be interesting.
Spider Handprints:
1. Spread paint evenly over the fingertips of one hand (not the thumb) and upper portion of the palm. Press onto a piece of paper. Recoat the area and turn the paper so the second set of prints form a spider's body and other four legs.
{While you have their hand covered in brown or black paint, consider making an extra print of their entire hand including the thumb to make it into a rake or extend the paint up onto their forearm to make a nice tree. These both would tie in nicely to a fall theme! And you get more mileage out of the paint.}
2. Trace handprints (as above) onto craft foam. Cut out and add a magnet. Let the child decorate a spider face. Add the date for a keepsake craft. We made these several years ago and it's fun to pull them out of the fall decorations each year to see how their hands have grown!
Web Painting:
1. Marble Rolling Webs - cut a piece of black paper and lay it into a shoe box lid or cardboard tray. Add a small amount of white paint and a marble. Allow the child to rotate the tray creating lines of paint. {Add either salt or glitter to the paint so that it glimmers when it dries.}
2. Frisbee Marble Rolling - same idea as above except you cut the paper in the shape of circle and use a frisbee instead of the tray.
3. Tire paintings - take a toy car or truck. Roll the wheels through a small amount of white paint. Then have the child push the car around on black construction paper. To make it look more like a web, show how to paint from one edge of the paper to the other. This project is best if first done on small paper, such as a half sheet of construction paper. Once the child gets the idea, a large paper or even posterboard makes a nice display!
4. White glue drizzled onto black paper makes a fun web. Be sure that children have the ability to squeeze the bottle and move around the paper to create the effect that you want. Otherwise, a large puddle of glue is what you will end up with.
Sensory Bin Ideas:
1. Spider Not Spider - After explaining the difference between spiders and insects, have them go on a spider hunt in this bin. I used a collection of plastic bugs, foam spiders, and base of shredded green paper & shredded brown wallpaper. Having just one type of spiders made it easy to distingush spiders made this an independent activity for the younger kids. The older kids had fun sorting and name the other insects as well!
 2. Spiders & "Black Bean" Flies - The spiders were plastic rings from the Dollar Store. I planned on cutting the ring off but it seemed too sharp for my 2 year old to play with, so I left the rings on. For the flies, I added three bags of dried black beans. I also planned on adding dried spaghetti as webs, but my children were playing so nicely with this bin that I never added it. This bin was a big hit with the preschool kids as well!

3. Water Table with Spiders - as simple as putting water and plastic spiders into a bin. My children at home loved it. At preschool we added a few mesh scoops for kids to rescue the floating spiders!
4. Cooked and cooled spaghetti - let children play with a small amount in a bowl. Once their interest wanes, suggest dipping a piece of spaghetti in white paint and dragging it across construction paper to create another type of web.
5. Hiding Spiders - take artificial spider webbing, which is found at Halloween with the decorations, and add it to a tray. Add a collection of plastic spiders, spider rings, and flies (or other insects). As the kids play in the bin the spiders and fly get tangled in the web. It's quite a job to find all the hidden critters and even harder to remove them once they are embedded in the web.

6. Dramatic Spider Web Play Box - to make this I wove a yarn web by attaching binder clips to the top lip of an oversized cardboard tray. I added one spider and one oversized fly and showed the children how to play "Spider & Fly" with a friend. It was great fun to hear the stories they told as played! Of course the web was slowly deconstructed but still lots of fun & learning was happening.

Spider Art:
1. The classic paper spiders with accordian legs are a not to be missed project. If you are making these with a large number of kids, it is easiest if you prefold sheets of construction paper into a fan and then cut the legs the desired width.
2. Headbands - make a headband from posterboard or painted cereal box. Attach eight accordian folded legs.
3. Number 8 - cut out a number eight and explain that spiders have 2 body parts (abdomen, cephalothorax). Glue eight legs onto the abdomen, suggesting that 4 go on one side and 4 on the other.
4. Cut out a spider body and legs. Allow the children to build their own spiders using the pieces. Felt or craft foam make this fun, but construction paper or cardstock would work as well. Help children count the legs. Explain that some spiders have as many as 8 eyes. By not gluing or attaching these pieces children can build it over and over again, almost like a homemade spider puzzle.

5. Egg Carton Spiders - cut egg cartons into sections with 2 egg cups. These two cups represent the spider's two body parts. Use cardboard egg cartons since they are easier to paint or decorate with markers. Add pipe cleaner or paper legs, googly eyes, and any other details you might like.
6. Glove/ sock puppet - I was brainstorming a fun puppet and thought that taking a pair of black gloves, stuffing the fingers, sewing them onto a black sock and then embellishing it would make a great little puppet. I haven't gotten past the brainstorming phase, but if I ever do...I'll come back and add a photo to this post!
7. Water Spout and Spider Craft - perfect for retelling the Itsy Bitsy Spider!

Spider Inspired Snacks:
After working with three year olds, I have decided there are less messier snacks than cupcakes! So I'm now on a hunt for more creative themed snacks that use healthy foods.
1. Plum spiders: Take a plum and add 8 chow mein noodles for legs.
2. Raisins make perfect 'flies' and can be added easily to any other snack. "Oh look, a fly landed on your cheese stick!" "How many flies are in your yogurt?"
3. Spider do not ingest their prey, instead they drink it. To illustrate the point, I made a bunch of laminated fly clip art. Then I punched a whole into it and inserted a straw. We tried drinking 'fly juice' from our straws. The drink could be anything but I chose lemonade in clear cups. I think the color and tart flavor added to the experience.

4. Gushers - we practice eating flies by putting one 'Gusher' fruit snack into our mouths. We gently bit into them and sucked the juice out. Talk about exciting!!!
5. Curds and Whey - explaining to kids what this is helpful, but making real curds and whey is even more fun. (add link) Follow this with a tastier version by serving cottage cheese and some sort of fruit. Be sure to get out your tuffet too so you can act out Miss Muffet! Try hanging one of your homemade spiders for a full retelling of the tale!
Science Activities:
1. Having pictures and posters of a variety of spiders makes learning characteristics even more fun
2. Catching a live spider to observe is great too. Just be sure to release it after a few hours.
3. Going on a nature walk and looking for spiders and webs is lots of fun. If you take a sock filled with cornstarch, you can make the web more visible by lightly sprinkling it. This also makes it more fun to photograph! Explain the importance of not disturbing the webs. Taking a photograph is a much better way of capturing the web.
4. Spider Food - Looking at bugs is fun for kids of all ages. Whenever we find a dead bug we put it into a medicine jar and add it to our 'dead bug collection'. I brought out my collection to share at Nature Preschool and the kids were VERY impressed.
5. Yarn Webs - Form a circle with a few friends and take turns throwing a ball of yarn to each other. Talk about the characteristics of webs.
6. We found a web full of tiny baby spiders. My husband taught me this great trick. If you get close to the web and blow quickly on it, the baby spiders quickly disperse. My children were delighted watching how many baby spiders were there and could not believe how fast they moved.
7. If you have access to a spider plant with lots of babies, try planting them. Your child will have fun watching their very own spider plant grow. Add a popsicle stick with a pretend spider attached to the pot so they will remember the name of their plant.
8. How do spiders know when a fly is on their web? Though they have eyes, spiders primarily use their sense of touch. We played a game using this homemade mat (table cloth and painter's tape) to practice finding the fly. After gently shaking the mat the child who's turn it was had to slowly feel around for the fly. Of course at home my sweet girl thought it was much more fun to dance and sing "Ring around the Rosie"!

Nursery Rhymes & Songs:
1. Little Miss Muffet
2. Spider On the Floor
3. Itsy Bitsy Spider
Books for Read Alouds:
The Very Busy Spider by Eric Carle
Spiders by Gail Gibbons
The Big Bug Search by Ian Jackson (not exclusively spiders but lots of fun)
Are You a Spider? by Judy Allen and Tudor Humphries
Spider on the Floor (Raffi Songs to Read) ISBN 0-517-88553-0
Spinning Spiders by Melvin Berger
Be Nice To Spiders by Margaret Bloy Graham - Copyright 1967 -- This is a wonderful picture book to share with children to teach the important role spiders play. I found my used copy on Amazon and my children were amazed to learn that 'this book was made before Mommy was even born'.
Aaaarrgghh Spider! by Lydia Monks -- I was disappointed with this book. The review made me think that it would be good for teaching children about being kind to spiders. However the flushing the spider down the toilet, walking it on a leash, and having a house overrun by spiders made me feel like this book was not a good read aloud for teaching about being kind to spiders!
Other spider resources on the web:
Eric Carle's Very Busy Spider page - http://www.eric-carle.com/bb-VBS.html
One of my favorite websites - http://www.teachpreschool.org/2010/10/itsy-bitsy-spider-day-in-preschool/
Another favorite website. Spiders are just a small part of her bug theme - http://prekinders.com/bugs-theme/
DLTK is my 'go to' place for age appropriate crafts! This link takes you to all their Miss Muffet related ideas! http://www.dltk-teach.com/rhymes/missmuffet/index.htm
S is for Spider - coloring page: http://www.first-school.ws/theme/animals/insects/spider.htm
Lots of great ideas at this site. I like the Itsy Bitsy Paint Stick Flip and Rhyme idea, and the Spider Math Mats too! http://www.makinglearningfun.com/themepages/spiders.htm
http://atozteacherstuff.com/Printables/Spiders/index.shtml
Lots of great ideas here - http://www.kinderkorner.com/spiders.html
Even more fun ideas here - http://www.preschoolexpress.com/theme_station01/oct01_spiders.shtml
A fun gross motor activity that requires just painters tape and few pretend spiders - http://www.notimeforflashcards.com/2011/10/spider-web-gross-motor-activity.html
Indoor spider web game. I love this idea but I would NOT teach my child to 'kill the spider' as she did. http://www.playcreateexplore.com/2011/06/indoor-spiderweb-and-bug-rescue.html
Lucky for me I have a great test audience at home - my 6 year old son and 2.5 year old daughter! The photos are my kiddos testing out the projects for preschool!
Weaving Webs:
1. Paper plate with whole punches along the edge. Tie a string onto one hole. At the other end of the string attach a small piece of pipe cleaner, this will be used to weave the web and when finished attach a spider ring to the pipe cleaner. This is great for fine motor skills. For younger children make sure the string isn't too long or it becomes frustrating for them to weave.
My preschoolers had a lot of fun with this project and they were extremely excited to take it home to play with. Next time I'd like to have some flies to attach as well.

2. Foam trays with small notches cut out of can be used for weaving webs as well.
3. Glue three tongue depressors or popsicle sticks together to form a star. Attach a string to one and weave the web by looping around stick, pulling straight to the next, looping, pulling straight, and continue until finished. This could also be done by using small branches or sticks from nature!
4. For older children you could teach them how to make a dream catcher. (This site has a good tutorial - http://www.nativetech.org/dreamcat/dreminst.html ) Comparing a real spider web to your homemade dream catcher would be interesting.
Spider Handprints:
1. Spread paint evenly over the fingertips of one hand (not the thumb) and upper portion of the palm. Press onto a piece of paper. Recoat the area and turn the paper so the second set of prints form a spider's body and other four legs.
{While you have their hand covered in brown or black paint, consider making an extra print of their entire hand including the thumb to make it into a rake or extend the paint up onto their forearm to make a nice tree. These both would tie in nicely to a fall theme! And you get more mileage out of the paint.}
2. Trace handprints (as above) onto craft foam. Cut out and add a magnet. Let the child decorate a spider face. Add the date for a keepsake craft. We made these several years ago and it's fun to pull them out of the fall decorations each year to see how their hands have grown!
Web Painting:
1. Marble Rolling Webs - cut a piece of black paper and lay it into a shoe box lid or cardboard tray. Add a small amount of white paint and a marble. Allow the child to rotate the tray creating lines of paint. {Add either salt or glitter to the paint so that it glimmers when it dries.}
2. Frisbee Marble Rolling - same idea as above except you cut the paper in the shape of circle and use a frisbee instead of the tray.
3. Tire paintings - take a toy car or truck. Roll the wheels through a small amount of white paint. Then have the child push the car around on black construction paper. To make it look more like a web, show how to paint from one edge of the paper to the other. This project is best if first done on small paper, such as a half sheet of construction paper. Once the child gets the idea, a large paper or even posterboard makes a nice display!
4. White glue drizzled onto black paper makes a fun web. Be sure that children have the ability to squeeze the bottle and move around the paper to create the effect that you want. Otherwise, a large puddle of glue is what you will end up with.
Sensory Bin Ideas:
1. Spider Not Spider - After explaining the difference between spiders and insects, have them go on a spider hunt in this bin. I used a collection of plastic bugs, foam spiders, and base of shredded green paper & shredded brown wallpaper. Having just one type of spiders made it easy to distingush spiders made this an independent activity for the younger kids. The older kids had fun sorting and name the other insects as well!


3. Water Table with Spiders - as simple as putting water and plastic spiders into a bin. My children at home loved it. At preschool we added a few mesh scoops for kids to rescue the floating spiders!
4. Cooked and cooled spaghetti - let children play with a small amount in a bowl. Once their interest wanes, suggest dipping a piece of spaghetti in white paint and dragging it across construction paper to create another type of web.
5. Hiding Spiders - take artificial spider webbing, which is found at Halloween with the decorations, and add it to a tray. Add a collection of plastic spiders, spider rings, and flies (or other insects). As the kids play in the bin the spiders and fly get tangled in the web. It's quite a job to find all the hidden critters and even harder to remove them once they are embedded in the web.

6. Dramatic Spider Web Play Box - to make this I wove a yarn web by attaching binder clips to the top lip of an oversized cardboard tray. I added one spider and one oversized fly and showed the children how to play "Spider & Fly" with a friend. It was great fun to hear the stories they told as played! Of course the web was slowly deconstructed but still lots of fun & learning was happening.

Spider Art:
1. The classic paper spiders with accordian legs are a not to be missed project. If you are making these with a large number of kids, it is easiest if you prefold sheets of construction paper into a fan and then cut the legs the desired width.
2. Headbands - make a headband from posterboard or painted cereal box. Attach eight accordian folded legs.
3. Number 8 - cut out a number eight and explain that spiders have 2 body parts (abdomen, cephalothorax). Glue eight legs onto the abdomen, suggesting that 4 go on one side and 4 on the other.
4. Cut out a spider body and legs. Allow the children to build their own spiders using the pieces. Felt or craft foam make this fun, but construction paper or cardstock would work as well. Help children count the legs. Explain that some spiders have as many as 8 eyes. By not gluing or attaching these pieces children can build it over and over again, almost like a homemade spider puzzle.

5. Egg Carton Spiders - cut egg cartons into sections with 2 egg cups. These two cups represent the spider's two body parts. Use cardboard egg cartons since they are easier to paint or decorate with markers. Add pipe cleaner or paper legs, googly eyes, and any other details you might like.
6. Glove/ sock puppet - I was brainstorming a fun puppet and thought that taking a pair of black gloves, stuffing the fingers, sewing them onto a black sock and then embellishing it would make a great little puppet. I haven't gotten past the brainstorming phase, but if I ever do...I'll come back and add a photo to this post!
7. Water Spout and Spider Craft - perfect for retelling the Itsy Bitsy Spider!

Spider Inspired Snacks:
After working with three year olds, I have decided there are less messier snacks than cupcakes! So I'm now on a hunt for more creative themed snacks that use healthy foods.
1. Plum spiders: Take a plum and add 8 chow mein noodles for legs.
2. Raisins make perfect 'flies' and can be added easily to any other snack. "Oh look, a fly landed on your cheese stick!" "How many flies are in your yogurt?"
3. Spider do not ingest their prey, instead they drink it. To illustrate the point, I made a bunch of laminated fly clip art. Then I punched a whole into it and inserted a straw. We tried drinking 'fly juice' from our straws. The drink could be anything but I chose lemonade in clear cups. I think the color and tart flavor added to the experience.

4. Gushers - we practice eating flies by putting one 'Gusher' fruit snack into our mouths. We gently bit into them and sucked the juice out. Talk about exciting!!!
5. Curds and Whey - explaining to kids what this is helpful, but making real curds and whey is even more fun. (add link) Follow this with a tastier version by serving cottage cheese and some sort of fruit. Be sure to get out your tuffet too so you can act out Miss Muffet! Try hanging one of your homemade spiders for a full retelling of the tale!
Science Activities:
1. Having pictures and posters of a variety of spiders makes learning characteristics even more fun
2. Catching a live spider to observe is great too. Just be sure to release it after a few hours.
3. Going on a nature walk and looking for spiders and webs is lots of fun. If you take a sock filled with cornstarch, you can make the web more visible by lightly sprinkling it. This also makes it more fun to photograph! Explain the importance of not disturbing the webs. Taking a photograph is a much better way of capturing the web.
4. Spider Food - Looking at bugs is fun for kids of all ages. Whenever we find a dead bug we put it into a medicine jar and add it to our 'dead bug collection'. I brought out my collection to share at Nature Preschool and the kids were VERY impressed.
5. Yarn Webs - Form a circle with a few friends and take turns throwing a ball of yarn to each other. Talk about the characteristics of webs.
6. We found a web full of tiny baby spiders. My husband taught me this great trick. If you get close to the web and blow quickly on it, the baby spiders quickly disperse. My children were delighted watching how many baby spiders were there and could not believe how fast they moved.
7. If you have access to a spider plant with lots of babies, try planting them. Your child will have fun watching their very own spider plant grow. Add a popsicle stick with a pretend spider attached to the pot so they will remember the name of their plant.
8. How do spiders know when a fly is on their web? Though they have eyes, spiders primarily use their sense of touch. We played a game using this homemade mat (table cloth and painter's tape) to practice finding the fly. After gently shaking the mat the child who's turn it was had to slowly feel around for the fly. Of course at home my sweet girl thought it was much more fun to dance and sing "Ring around the Rosie"!

Nursery Rhymes & Songs:
1. Little Miss Muffet
2. Spider On the Floor
3. Itsy Bitsy Spider
Books for Read Alouds:
The Very Busy Spider by Eric Carle
Spiders by Gail Gibbons
The Big Bug Search by Ian Jackson (not exclusively spiders but lots of fun)
Are You a Spider? by Judy Allen and Tudor Humphries
Spider on the Floor (Raffi Songs to Read) ISBN 0-517-88553-0
Spinning Spiders by Melvin Berger
Be Nice To Spiders by Margaret Bloy Graham - Copyright 1967 -- This is a wonderful picture book to share with children to teach the important role spiders play. I found my used copy on Amazon and my children were amazed to learn that 'this book was made before Mommy was even born'.
Aaaarrgghh Spider! by Lydia Monks -- I was disappointed with this book. The review made me think that it would be good for teaching children about being kind to spiders. However the flushing the spider down the toilet, walking it on a leash, and having a house overrun by spiders made me feel like this book was not a good read aloud for teaching about being kind to spiders!
Other spider resources on the web:
Eric Carle's Very Busy Spider page - http://www.eric-carle.com/bb-VBS.html
One of my favorite websites - http://www.teachpreschool.org/2010/10/itsy-bitsy-spider-day-in-preschool/
Another favorite website. Spiders are just a small part of her bug theme - http://prekinders.com/bugs-theme/
DLTK is my 'go to' place for age appropriate crafts! This link takes you to all their Miss Muffet related ideas! http://www.dltk-teach.com/rhymes/missmuffet/index.htm
S is for Spider - coloring page: http://www.first-school.ws/theme/animals/insects/spider.htm
Lots of great ideas at this site. I like the Itsy Bitsy Paint Stick Flip and Rhyme idea, and the Spider Math Mats too! http://www.makinglearningfun.com/themepages/spiders.htm
http://atozteacherstuff.com/Printables/Spiders/index.shtml
Lots of great ideas here - http://www.kinderkorner.com/spiders.html
Even more fun ideas here - http://www.preschoolexpress.com/theme_station01/oct01_spiders.shtml
A fun gross motor activity that requires just painters tape and few pretend spiders - http://www.notimeforflashcards.com/2011/10/spider-web-gross-motor-activity.html
Indoor spider web game. I love this idea but I would NOT teach my child to 'kill the spider' as she did. http://www.playcreateexplore.com/2011/06/indoor-spiderweb-and-bug-rescue.html
Wednesday, September 28, 2011

Monday, September 26, 2011
Sunflowers

Maybe we'll even get around to planting a sunflower house! It would be quite magical to step inside of a house made of these giants!
As for that pink flamingo in the picture~~~hopefully he will fly south for the winter and not return. Somehow he keeps taking center stage in the garden. The kids must love him much more than me!
Sunday, September 25, 2011
Leaf Man

One of my favorite fall books is Leaf Man by Lois Ehlert. The beautiful leaf collages tell the story of Leaf Man and his journey. Since "a Leaf Man's got to go where the wind blows"....we figured he should venture over to Vermont.
So we tried our hand at our leaf man creations today. Though they aren't nearly as imaginative as the book's various animals and objects, my kiddos were quite proud of their creations. I'm sure this is something we will recreate throughout the autumn! Especially after we revisit and reread the book a few more times.

Also, if you check out the book from the library, be sure to look at the endpapers. It's like a simple field guide to leaves and Ehlert explains her technique for the leaf collage.
And....as you gather your leaves it's always fun to sing, "We're going on a leaf hunt.."
Leaf Crowns

We spent Saturday at the Burke Fall Festival and Sunday close to home enjoying the gorgeous fall day. The kids and I went for a walk in the woods to gather brightly colored leaves and other treasures. When we got back to the backyard I suggested we make leaf headbands, which was NOT received well by my 6 year old son. Clearly his understanding of 'headbands' is something with ribbons and bows and clearly only meant for girls to wear!
So I came up with a completely new project. Leaf CROWNS, you know, the kind that manly kings wear when they are in charge of their empire or forest!
Clearly my re-wording was acceptable because my son dove right in to attaching the leaves to the crown! And of course, little sis, was following right along.
 |
| Not to brag, but check out the thickness of that carrot we grew! |
To make: cut a thin cardboard crown to fit your child's head (cereal boxes work great). Add strips of double sided tape and attach brightly colored leaves that you've gathered. You could use glue instead, but I thought the tape would work better on fresh leaves, could be worn instantly, and it was mess-free for my 2 year old!
Voila, you too can be the king or queen of your forest!
Monday, August 29, 2011
Kids Nature Journals


I whole punch plain and colored paper and insert it in the journal. There are countless things to record and write about in the journal. For now my son mostly likes to draw pictures of what he sees in nature. I've tried to get him to write sentences or even label the pictures but so far he is reluctant to do so.
Another favorite activity in the journal this summer was to trace the cucumbers and measure them.
Do you use a nature journal with your kids? I'd love to hear more about it!
Thursday, July 14, 2011
Quiet on the blog-front!

Our summer has been wonderful...but I've been a little slack on posting to this blog. I guess I'm so busy being outside with my 'nature loving kids' that I haven't made much time to blog about it!
I have started a second blog www.primarylearninglogs.blogspot.com that you may want to check out. It focuses on learning activities (mostly with my 5 year old) and lots of early math information!
Hope you are getting to spend lots of time in nature this summer too!
Thursday, July 7, 2011
Lessons from our Maple Tree

We had heavy winds yesterday as a quick storm passed through the area. The winds knocked down a large branch from one of our maple trees. After the storm passed we talked to my son about how the tree is slowly dying and explained that is why it's losing branches.
After breakfast this morning he went to the fallen branch, bucket in hand. He collected all the maple seeds that he could find. He loves finding the "whirlybirds" and playing helicopters with them. As he was bringing his pile onto the deck he explained that he wouldn't be playing with these seeds but instead would be planting them, ALL of them, so he could grow more maple trees all around the yard.
Sadly, I don't think the seeds are fully matured since they are quite plump and green. I guess time will tell us if they will grow or not. I have read that most maple species require stratification in order to germinate, so I will explain that process to him and we can experiment with his new seed collection.
Over the last few months he has become quite the horticulturalist. He is very proud of the apple seed that he has gotten to sprout. Now to see if we can get this large pile of maple seeds to sprout as well. Wait....this could turn into a HUGE project! I do love to see his empathy for the dying tree though...what a sweet boy I have!
"He that plants trees loves others beside himself."- Thomas Fuller
Tuesday, July 5, 2011
Recipes from Nature

Who's ready to come over for some of our nature inspired recipes?
This particularly yummy looking concoction the kids recently made is their very own version of 'Cake and Apple Pie'. When I suggested we call it 'stone soup' I was told, "hula hoops are pie pans and you CAN'T make soup in pie pans!" (Duh, everyone knows that!)
So I asked about the ingredients and this led to writing the recipe out. Now we can remember how to make it again! Don't you just love the added illustrations!

Wednesday, June 22, 2011
Garden Fence

So it serves no real purpose but isn't my son's garden fence just perfect. We bought this little white picket fence at Home Depot and he decorated them with permanent markers. The plan was to paint them, but when you have a two year old sister "helping" markers seemed a bit more practical.
Gardening with kids is so much fun. He is so proud of his own little garden...and it's growing beautifully. I know he's learning all kinds of life lessons in the garden...just as I did in my mom's gardens and greenhouse! xoxox
Tuesday, June 7, 2011
Dinosaur Egg Hatching

About two weeks before the party we made up a batch of fossil dough (see link below). We made the dough into egg shapes and put a small plastic dinosaur inside of it. Each day for about a week,we turned the eggs over so that they would dry evenly. Most of them dried in 5-6 days but the really big ones took 10 days.
Once dried they were as hard as rocks. We hid the eggs in a "nest" which was a turtle sandbox lid that was filled with straw. The kids at the party each got to find 2 eggs. Then they took the eggs to the "Egg Hatching Station" to see what was hiding inside. At the station we had protective eye wear, small hammers, rubber mallets, metal scrapers, and paintbrushes. As the kids opened them, they squealed in delight at their baby dinosaurs!
The project was a huge hit but it was very messy. (Definitely not an indoor project!) To make clean up easier we laid a large canvas drop cloth down first. After the party we just took the canvas in the woods to shake it out since everything was biodegradable!
I'm going to surprise David this doing this project next week. I know he will be excited!
This link has a recipe similar to what we used to make our dino eggs!
http://www.amazingmess.com/2011/06/fossil-dough.html
Wednesday, June 1, 2011

Wednesday, May 25, 2011

Sunday, May 22, 2011
Pumpkin Patch

Last fall, my son was inspired to by a little friend who won a ribbon at the local fair for her pumpkin. He left her house either wanting to grow pumpkins or raise chickens, since she was keeping busy with both at the time. I eagerly suggested the pumpkins and snuffed out any crazy ideas of building a chicken coop.
I'm not sure we will produce anything blue ribbon worthy, but we are going to at least have fun trying!
Any pumpkin growing tips are encouraged.
Apple Blossoms

This morning it almost looked like we had snow again, but luckily it was just the blossoms falling off the apple tree!
The kids and I had fun scooping up blossoms and tossing them at one another!

We decided that we would take a photo of us by the apple tree in each season and then write a book about it. So this is our first in the series....Spring!
Wednesday, May 18, 2011

Worm Resources for Kids!
So maybe I should rename my blog "Worm Loving Kids" because I have been blogging mostly about worms lately!
My son is simply addicted to worm hunting. Today he was out in the woods gathering new worms to add to our garden. A neighbor walked by on the road and asked him what we was up to. My son said, "hunting for worms". The man said, "oh, you are getting ready to go fishing?"
Slightly stunned, my son answered, "No, I'm bringing worms to the garden!"
"Oh, the worms probably like that more, huh?" said the man. My son quickly replied, "Yes!" Then he clutched the bucket, walked into the yard where I was, and told me: "I guess some people just go fishing with these guys."
Another sweet memory made in nature!!!
Two new online resource I found for other earthworm fanatics:
Earthworms Unit & Lapbook at the link:
http://www.homeschoolshare.com/worms.php
Squirmin' Herman is a great site to explain earthworm anatomy and worm facts!
http://urbanext.illinois.edu/worms/anatomy/index.html
Tuesday, May 17, 2011
Ladybug Rocks using Paint

One of my favorite decorations for my daughter's second birthday were the ladybug painted rocks. They turned out really cute and literally cost next to nothing to make.

We found the rocks in our woods and washed them well. After drying for a couple of days, we spray painted them red. After that was dry, my son and I painted on black spots with acrylic paint. To create the face we added the largest wiggly eyes we could find and used pipe cleaners for the mouth and antenna.
My plan is to use them as decorations in the garden this summer. Likely the paint will slowly wear away, but I plan on spraying a clear coat to help protect it.
Worm Boxes

My son continues to be fascinated by earthworms, so I have been on the internet looking for fun facts and activities to learn more about earth worms. My best internet find so far is:
http://data.memberclicks.com/site/ndc/nature-kids-teachers-corner-worms.pdf
This link has a wonderful printable that explain how to make a worm box and a worm jar. The second page explains more details about worms.
He had fun making the worm box and even got to take his Grammy on 'worm hunt' to fill up his box. After it was made, we decided that the box would stay outside and we would keep checking on it. He decided to bury the box part way and when I asked why, he explained. "So if any of the worms decide they want to live somewhere else they can crawl out!"
A fun little song to sing while worm hunting (or building your own worm box) is 'Wiggle Worm'!
“Wiggle Worm”
Have you ever seen a wiggle worm,
A wiggle worm, a wiggle worm?
Have you ever seen a wiggle worm
Go this way and that?
Go this way and that way,
Go this way and that way.
Have you ever seen a wiggle worm
Go this way and that?
Buggy Sensory Bin

I love having a new sensory bin for my kids to play with every couple of weeks. Unfortunately my (just turned) two year old daughter still puts everything in her mouth. This limits what I can put into my bins since I can't have small objects.
I found that shredded paper is a nice base and my daughter isn't interested in eating it! For our buggy sensory bin I used green shredded paper to look like grass, added silk flowers from a leftover arrangement, red flowers from a cut up lei, and lots of larger sized plastic bugs. For the container, I used a plastic terracotta colored pot that was shallow. Beside it I added a wicker tray for her to use when she found the hiding bugs.
She has played with her buggy sensory bin for several weeks but has the most fun when a friend or grown up sits down with her. And if I sing, "we're going on a bug hunt"....she'd squeal in delight and head for the buggy bin!

Wednesday, May 4, 2011

Homemade Bird Eggs

I blogged back in April about making the nests, but I thought I should show the finished nests with their pretty blue eggs.
My son and I talked about making salt dough eggs to put into the nests. He immediately thought that each nest should have three eggs. Apparently a book he read at preschool showed a robin's nest that had three eggs, and therefore his nests had to have three eggs in each.
I suggested just one large egg per nest but he persisted that each needed three. So I gave him the abacus to figure out how many eggs we would need to make. (Secretly I thought that this would make him realize it was more eggs than we wanted to make...but instead it inspired him to create such a large number of eggs.) "Wow, we are going to need a lot of salt dough because we need 48 eggs!"
Our basic salt dough recipe:
The best part of this project is that my son took the lead. He had a plan as to what the nests should look like and how many eggs they needed. It's fun to let him take charge and support his ideas!
Ingredients: 4 cups all-purpose flour, 1 cup salt, and 1 ½ cups warm water.
- Preheat oven to 325 degrees F.
- Mix flour and salt well. Gradually add water, stirring with a large spoon. Finish mixing with hands. Knead until soft and pliable.
- Roll small pieces of dough into an egg shape.Place on cookie sheets. Bake until hard, about 1 to 1 ½ hours, depending on the thickness of the eggs.
- To color the eggs we used a liquid watercolor paint. We didn't achieve a true robin's egg blue but the color was very vibrant!.
Tuesday, May 3, 2011
My Worm Farmer!

The best part is how engrossed he becomes with his project.
So to encourage his interest (and to educate myself) I ordered three books about earthworms.
An Earthworm's Life (Nature Upclose) by John Himmelman
Earthworms by Claire Llewellyn & Barrie Watts
Garden Wigglers: Earthworms in Your Backyard by Loewen
I am envisioning this as a summer long outdoor project, that leads to an indoor worm farm next fall!
And of course I will blog about all that we learn!
"How the Forest Grew"
This afternoon I read aloud the book, How the Forest Grew by William Jaspersohn, to my son. It was a great introduction to the changes that occur in a forest and the process of succession. The text is simple and the ink drawings are serene & beautiful.
Before reading the book, I asked my son, "how did the forest get here?" He didn't have many thoughts on the topic and guessed that it was always there.
We spend a lot of time in the forest surrounding our house, but I don't think we ever talked about how it grew!
This book helped to explain that forests are constantly changing. It introduced the concept that different animals need different types of ecosystems. My son had never considered that the forest has different layers and had good ideas about the difference between the canopy and understory. His favorite portion of the book was how decaying matter makes humus, which makes sense because he is currently a self-described 'worm farmer'!
Though I didn't select this book for the purpose of explaining succession, I think that my son has really grasped the concept. This spring we have heard many trees falling in the woods. The idea that as older trees die they make room for younger trees is comforting to him. I think that this book helped reinforce that idea that changes in the woods is natural and that dying trees are part of the cycle.
This is a book that we will read several times, and I will use it as a starting point for new discussions. For instance, the book talks about changes that have occured over the last 200 years. When my son is older, creating a timeline to illustrate how the land went from a cleared farm to a healthy forest would be a great activity to do together.
~~~ISBN: 0-590-46049-8
Monday, May 2, 2011
Ladybug Rocks using Crayons

We are preparing for a festive "Ladybug Birthday" for our soon-to-be 2 year old! I like to take several weeks to prepare homemade decorations and games so that the festivities last for weeks and not just one day. Last week my five year old son and I made some really cute "Ladybug Rocks" using crayons.
 |
| Maybe he is tired of me taking his picture all the time? |
These would be great to make as counters for teaching one-to-one correspondence OR skip counting. You could cut out green felt or paper and place one ladybug on each leaf. Later each ladybug could be given 10, 5, or 2 spots and then the child could practice skip counting using the ladybugs!
For the birthday party these are going to be used as decorations. Can't make every moment about teaching early skills!
-----
I was inspired by the blog, 5 Orange Potatoes, to try out this project. Check out the link below for her more detailed explanation.
http://www.5orangepotatoes.com/blog/2011/03/04/hot-rocks-painting-with-wax-on-rocks/comment-page-1/#comment-13556
Harvesting Wild Ramps
Today we were invited to go harvesting wild ramps with three other families. Honestly, I had never heard of wild ramps but spending a couple of hours in the woods with some lovely moms and their kids is always an exciting adventure!


As I was harvesting the ramps, I thought it would be good to have some wild ramps growing in the forest behind our house. When I suggested it to my son, he was delighted at the thought of "FINALLY being able to plant something". We dug quite a few ramps that had all the roots still attached to the bulb and we will see how they transplant.
After reading up about ramps, I found out that in Quebec wild ramps are a threatened species and people are limited to harvesting just 50 plants or bulbs per year. Recently wild ramps have found a following in gourmet restaurants & local 'wild ramp festivals' have become popular. Unfortunately the new found popularity makes this plant at risk for being over-harvested. This makes me feel even better about trying to establish a patch of it in our woods!
Now to figure out what to do with the 2 buckets of ramps we brought home!
~~~~~This link has a 'how-to directions' for harvesting ramps.
http://www.ehow.com/how_4500871_find-wild-ramps.html

Wild ramps I learned are also called wild leek or wild garlic. It is an early spring vegetable and has a strong garlic or onion flavor. I didn't think to take a close up picture of just one ramp, but this photo shows how the plants have broad, smooth green leaves. (It reminds me of lily of the vally.) Once the plant is pulled up, it has a white stalk and scallion-like bulb. After doing some research I found that both the white stalk and the green leaves can be eatten.

As I was harvesting the ramps, I thought it would be good to have some wild ramps growing in the forest behind our house. When I suggested it to my son, he was delighted at the thought of "FINALLY being able to plant something". We dug quite a few ramps that had all the roots still attached to the bulb and we will see how they transplant.
After reading up about ramps, I found out that in Quebec wild ramps are a threatened species and people are limited to harvesting just 50 plants or bulbs per year. Recently wild ramps have found a following in gourmet restaurants & local 'wild ramp festivals' have become popular. Unfortunately the new found popularity makes this plant at risk for being over-harvested. This makes me feel even better about trying to establish a patch of it in our woods!
Now to figure out what to do with the 2 buckets of ramps we brought home!
 |
| Foraging for snacks...not wild ramps! |
~~~~~This link has a 'how-to directions' for harvesting ramps.
http://www.ehow.com/how_4500871_find-wild-ramps.html
Sunday, April 10, 2011
Tapping for Sap

Last week the kids at Nature Preschool were going to learn about maple sugaring and take a field trip to Miss Jane's sugar house. I had this vision of creating a model maple tree that they could tap and pretend to collect sap.
So I found the largest piece of cardboard I had, and got to work crafting a maple tree. Then I recruited my five year old to help me practice collecting the sap. He was a bit dismayed at how slow the drips were, but once a puddle of 'sap' collected in the bowl he became excited about the process. As with many of our projects and experiments, I lost interest long before him. He continued to collect the sap for almost an hour and only stopped because his little sister started dumping the sap bucket!
 How it works:
One child gets to stand in the back of the tree and starts the flow of sap by using a pipette to push water into the tap.
The other kids watch as the sap drips from the tap, runs through the plastic tubing, and finally collects into the bucket.
To keep a group of kids interested in the activity, be sure to have plenty of funnels, cups, spoons, strainers, and tubing for them to explore properties of 'sap'.
When I led this activity at Nature Preschool the kids were eager to be the one behind the tree and a line formed as they waited their turn. So I put additional pipettes in the water table and they played there until it was their turn to 'be the tree'.
** Check out my maple tree for yourself at the World Maple Festival on April 16th from 10 a.m. - 4 p.m. in St. Johnsbury, Vermont! The Balch Nature School at the Fairbanks Museum will be leading a pretend "Sap Collecting" activity in the Kid Zone area. More information about the festival can be found at www.worldmaplefestival.org
Monday, April 4, 2011
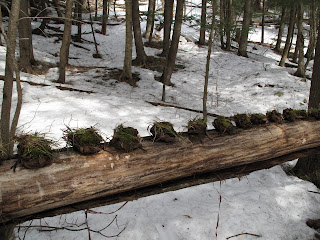
Bird Nest Creations

What began by pulling out some of the inner bark from a dead tree........

led to the creation of bird nests for an entire flock!
 |
| My son took this photo to show off his bird nest collection! |
My son was so excited by the first little nest that he decided he needed to make one for his preschool teacher. Then he decided he needed to make them for all the kids in his class and the helpers in class too.
So we started a little assembly line of bird nest crafting. He pulled out the bark as I wove it into a nest shape. Then he found the perfect amount of moss and pushed it down into the nest. Then he topped each of them off with some fresh green grass from a tiny little patch that we have in the woods.
In the end, the nests turned out so beautiful!
As we worked on the project I told my son how easy it was for us to collect the bark, moss, and grass but explained how a little bird would have to work much harder. He thought about it for a while and realized that birds don't have hands, and instead would have to use just their beak. I also added how the bird would have to carry each little twig or blade of grass up to their selected spot in a tree, and how it would take hundreds of trips to finish the nest.
He became really quiet...and then asked if we could just give our 16 nests to the birds.
"They need it more than my friends. And we can just climb up the tree to make the nests for them."
So we talked about why this wouldn't work...but decided that we would put his nest in a special tree. Then we could check on it throughout the spring to see if any bird decided to take up residence.
~What a sweet memory this afternoon spent in nature will be!
Go visit Go Explore Nature today to see photos that other nature loving kids have taken!
Mud Tub

Not to worry. I loosened up some of the dirt and she managed to get plenty dirty!
Subscribe to:
Comments (Atom)